Integrating SAP UI Integration Cards into Laravel offers developers a flexible and powerful toolset for displaying real-time business data.
Cards serve as versatile UI components that allow any data from any system to be displayed in an HTML host environment, not limited to SAP or Laravel alone. This makes SAP UI Integration Cards ideal for embedding diverse data points, such as analytics, notifications, and key metrics, directly within a Laravel admin dashboard.
By leveraging this flexible UI component, businesses can provide users with streamlined access to actionable information, enhancing both workflow efficiency and user experience across platforms.
In this article, we will explore how easy it is to set up SAP UI Integration Cards in a Laravel admin dashboard, focusing on how this approach simplifies data access and elevates usability in business applications for SMBs.
What we cover in this experiment:
- Who is SAP SE?
- What Are SAP UI Integration Cards?
- Why Use SAP UI Integration Cards in Laravel Admin Dashboards?
- How SAP UI Integration Cards Work
- Step-by-Step: Integrate SAP UI Integration Cards into Your Laravel Jetstream Dashboard
- TLDR;–What Exactly Do We Need to Do in Laravel?
- Final words
¶Who is SAP SE?
SAP SE is one of the world’s leading producers of software for the management of business processes.
Founded in 1972, the company was initially called System Analysis Program Development (Systemanalyse Programmentwicklung), later abbreviated to SAP. Since then, it has grown from a small, five-person endeavor to a multinational enterprise headquartered in Walldorf, Germany, with more than 105,000 employees worldwide.1
SAP SE's personnel expenses, primarily covering the labor costs of software developers, service and support staff, as well as administrative employees, totaled €3,386 million in 2023.2
With the dawn of the cloud era in recent years, SAP has completely shifted its strategy from being a semi-closed source company to becoming an open-source player.3
As the global market leader in ERP, CRM, HCM and SCM software, SAP’s significant investment in developing cutting-edge software and open-source frameworks is a strong indicator of value that other developer communities should seriously consider.
¶What Are SAP UI Integration Cards?
SAP UI Integration Cards provide a unified way to present application content to end users, regardless of the underlying data source. Designed to be easily embedded within various host environments—such as applications, dashboards, or any HTML page—these cards make data access seamless across platforms.
SAP offers a range of card types, each configurable through a simple JSON schema, eliminating the need for custom code to handle UI rendering. This low-code setup empowers even non-programmers to create and customize cards based on specific use cases, making it possible to quickly deliver targeted insights and essential data to users across diverse environments.
This experiment follows the documentation on integrating SAP UI Integration Cards into host environments.
¶Why Use SAP UI Integration Cards in Laravel Admin Dashboards?
Using SAP UI Integration Cards in a Laravel dashboard offers several advantages, particularly for companies relying on SAP for ERP but seeking modern web development frameworks for user interface flexibility, as well as for SMBs, agencies, and developers working with independent Laravel applications.
-
Unified Data Access: By embedding SAP UI Integration Cards, teams can centralize data from multiple sources, allowing quick access to essential information directly within a Laravel dashboard. This unification minimizes the need to toggle between applications, enhancing workflow efficiency.
-
Enhanced User Experience: SAP UI Integration Cards enable users to access real-time, structured data in a compact and visually engaging format. For agencies and SMBs, this can elevate the dashboard experience for clients, making data insights accessible and actionable without navigating complex interfaces.
-
Reduced Development Overhead: SAP UI Integration Cards come with pre-built templates and configuration options, which reduces the amount of custom code needed for setup. This low-code approach is especially beneficial for smaller development teams and agencies looking to deliver powerful data-driven dashboards on a budget.
-
Modular and Customizable: SAP UI Integration Cards are highly modular, allowing developers to add or modify data views without a complete redesign of the underlying code. For SMBs and agencies that frequently update or scale client dashboards, this modularity offers flexibility without significant redevelopment costs.
-
Scalability for Growing Applications: For small and medium-sized businesses, SAP UI Integration Cards offer a scalable way to incorporate rich data insights into their applications as they grow. They can be adapted for different data sources over time, making them ideal for companies looking to expand their data capabilities within Laravel.
-
Developer-Driven Augmentation: Developers working on standalone Laravel applications can use SAP UI Integration Cards to enhance dashboards with minimal effort, adding features such as analytics, notifications, and dynamic updates to dashboards that otherwise wouldn’t have easy access to such data points.
By offering a blend of accessibility, low-code customization, and adaptability, SAP UI Integration Cards bring value not only to large SAP-reliant companies but also to agencies, SMBs, and developers who want to provide robust data views within Laravel applications without extensive resources.
¶How SAP UI Integration Cards Work
SAP UI Integration Cards are designed to integrate seamlessly into various host environments, allowing users to display data from diverse sources within flexible and interactive UI components.
The integration process is based on straightforward embedding methods that enable developers to deploy these cards in applications, dashboards, and websites with minimal configuration. Here’s an overview of how SAP UI Integration Cards operate within different host environments:
-
JSON-Based Configuration: SAP UI Integration Cards use a JSON schema to define the card’s data sources, layout, and interaction behavior. This JSON structure simplifies customization, enabling developers to configure data bindings, set layout properties, and apply styles without additional code.
-
Embedding in Host Environments: Cards can be consumed through SAP’s OpenUi5 framework or directly within HTML. This flexible embedding approach makes it possible to display cards in almost any HTML-based environment, including standalone web applications, content management systems, and custom dashboards like those built in Laravel.
-
Data Binding and Source Flexibility: SAP UI Integration Cards support multiple data sources, allowing developers to connect to OData services, REST APIs, and other endpoints. This flexibility enables cards to pull live data from SAP and non-SAP systems alike.
-
Adaptable UI Controls: The card framework includes several pre-defined card types, such as list, table, and analytical views, which developers can select and configure based on the use case. Each card type is designed for specific data display needs, with customization options that allow developers to adapt the UI to match the visual style of their application or dashboard.
-
Interactivity and User Actions: SAP UI Integration Cards support interactive features, such as user-initiated actions, links, and navigation. This functionality allows end users to engage with data directly from the card, making it easy to drill down into details or trigger actions based on card content.
SAP UI Integration Cards thus provide a modular, easily configurable, and highly adaptable way to enhance applications and dashboards, bringing data from multiple sources into a unified, interactive display. This integration flexibility is particularly valuable for developers looking to enrich their Laravel or other HTML-based applications without extensive coding.
¶Step-by-Step: Integrate SAP UI Integration Cards into Your Laravel Jetstream Dashboard
Now that we've explored the powerful features and flexibility of SAP UI Integration Cards, it’s time to roll up our sleeves and dive into implementation!
Imagine bringing these dynamic data displays to life in a clean Laravel Jetstream installation—let’s get started and see the integration in action!
Setting Up a Laravel Development Environment with Docker
In the past, setting up a complete Laravel development environment with all necessary parts was time-consuming. With Docker Desktop, now available for all major operating systems, this can be done in minutes with just a few commands and simple configuration steps.
Docker is a tool for deploying and running executables in isolated and reproducible environments. This may be useful, for example, to test code in an environment identical to production or to test something completely new without harming your well-thought-out operating system setup.
Here we go!
First, in an empty folder we need to create a Dockerfile.
# Use the official PHP 8.3-fpm image as the base
FROM php:8.3-fpm

# Install system dependencies
RUN apt-get update && apt-get install -y \
    git \
    unzip \
    libzip-dev \
    sqlite3 \
    libsqlite3-dev \
    && docker-php-ext-install zip pdo pdo_sqlite

# Install Redis extension for PHP
RUN pecl install redis && docker-php-ext-enable redis

# Install Composer globally
RUN curl -sS https://getcomposer.org/installer | php -- --install-dir=/usr/local/bin --filename=composer

# Install Node.js (LTS version) and npm
RUN curl -fsSL https://deb.nodesource.com/setup_lts.x | bash - \
    && apt-get install -y nodejs

# Set working directory
WORKDIR /var/www/html

# Set permissions for Laravel (assuming app will be copied later)
RUN chown -R www-data:www-data /var/www/html

# Run PHP FPM server by default
CMD ["php-fpm"]
The Dockerfile defines an image by specifying the environment configuration, including the base image, software dependencies, and commands for setting up that environment. It’s used to build an image for a container, outlining how that specific environment (like PHP, Composer, and Node.js for Laravel) should be constructed. Think of it as the "recipe" for creating one type of image.
Our specific Dockerfile defines a containerized environment for Laravel, installing PHP 8.3, Composer, Node.js, and Redis, ensuring all dependencies are pre-configured for seamless development.
To run the services of the image provided by the Dockerfile we need another configuration file, the docker-compose.yml.
This file defines a multi-container application by describing the services that make up the application and how they interact. It specifies the configuration for each service, like environment variables, networking, and volumes.
Here’s our docker-compose.yml:
services:
  app:
    build: .
    container_name: laravel_app
    volumes:
      - .:/var/www/html
    working_dir: /var/www/html
    environment:
      - APP_ENV=local
      - APP_DEBUG=true
      - DB_CONNECTION=sqlite

  webserver:
    image: nginx:latest
    container_name: laravel_nginx
    depends_on:
      - app
    volumes:
      - .:/var/www/html
      - ./nginx.conf:/etc/nginx/conf.d/default.conf
    ports:
      - "8000:80"

  redis:
    image: redis:alpine
    container_name: laravel_redis
    ports:
      - "6379:6379"

  node:
    image: node:lts
    container_name: laravel_node
    working_dir: /var/www/html
    volumes:
      - .:/var/www/html
    command: ["npm", "install"]
With those two files in place, it’s time to start Docker Desktop and open a command line.4
First, let's start the containerized services. We’ll do this with the following command:
$ docker compose up -d --build
This does the following:
-
Builds Images (
--build): (Re-)builds the Docker images for each service based on theDockerfileor if there are any changes. This ensures that each service is up to date with the latest configurations. -
Starts Containers in Detached Mode (
-d): Launches the containers in the background (detached mode), allowing you to keep using the terminal for other commands. -
Runs All Services: Starts up all the services defined in the
docker-compose.ymlfile, orchestrating them to work together as specified in the configuration.
In summary, this command builds and runs all defined services in the background, creating an up-to-date, ready-to-use environment.
This might take a little time, so feel free to grab a coffee while Docker builds the images and starts up the services!

With a fresh dose of caffeine, we’re ready to continue!
$ docker compose exec app bash
After running this command, you’ll notice that the command prompt has changed—we’ve entered our container and are now in a completely new environment. How amazing is that?
Before we continue by globally installing the Laravel installer, here’s how you can exit and stop the container.
To exit the container simply enter exit on the command line. To stop the container use:
$ docker composer down
Welcome to the world of containers!
Ok, let’s continue installing the Laravel installer:
$ composer global require laravel/installer
Adding the Composer vendor/bin directory to our PATH.
$ export PATH="$PATH:$HOME/.composer/vendor/bin"
And now, we start with the Laravel project creation wizard.
But wait!
The wizard expects a completely blank directory to create the new Laravel project. Since we already have files and configurations in place from our Docker setup, it mistakenly thinks an application already exists.
To solve this, we’ll create the project in a temporary directory and then move the files into the main directory.
$ laravel new temp
Let’s dive into the project creation wizard.
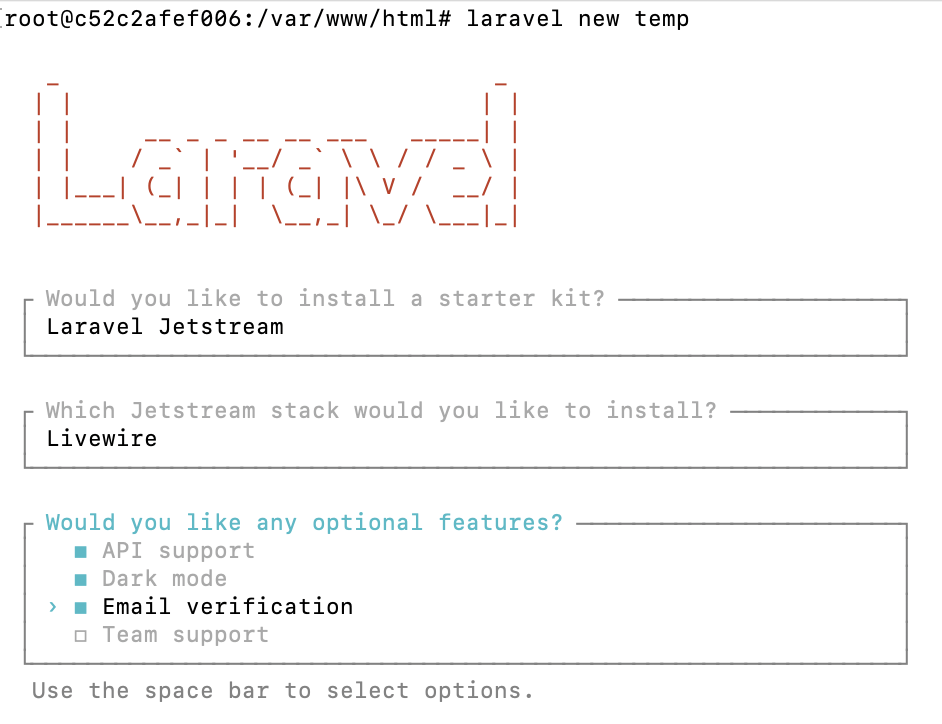
For what we're doing today, it doesn’t really matter which starter kit you choose. I chose Jetstream because this project will be with me for quite a few experiments.
As for the frontend stack, I always stick with Livewire—for reasons I can’t quite remember!
Neither the features nor the testing framework you choose will impact what we’re doing today.
Important is the next question, which database our application will use.
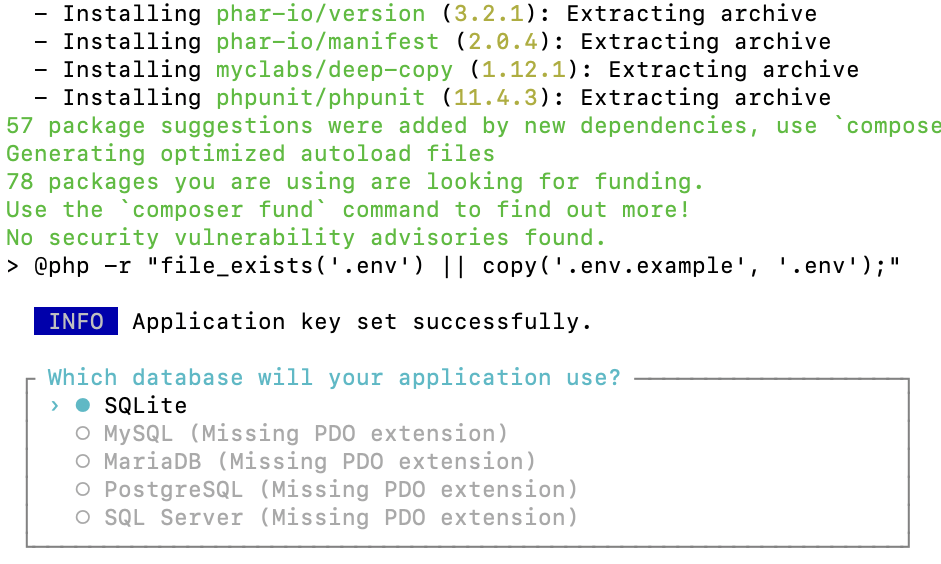
Laravel’s giving us a heads-up about missing PDO extensions since we only included SQLite in our Dockerfile, remember? So, we’ll just stick with SQLite.
When asked if we want to migrate the database, we go ahead and say yes. But Laravel doesn’t stop there—Jetstream gets installed, adding new migrations to the project, so we’ll see the migration prompt pop up a second time, and we’ll agree to it again.
Next we need to move the installation files from our temp directory into the directory where our Dockerfile resides and delete the empty directory left over. We do this with the following two commands.
$ mv temp/* .
# to also include all . files
$ mv temp/.* .
# if you want to be sure the moves worked correctly,
# double check with ls -la
$ rm -f temp
All that’s left is to seed the database with a test user which is provided out of the box by the Laravel team.
$ php artisan db:seed
Now, the moment of truth has arrived! We head over to the browser, enter http://localhost:8000, and wait eagerly for the standard Laravel home page to appear.
If you’ve followed each step correctly, you should see…
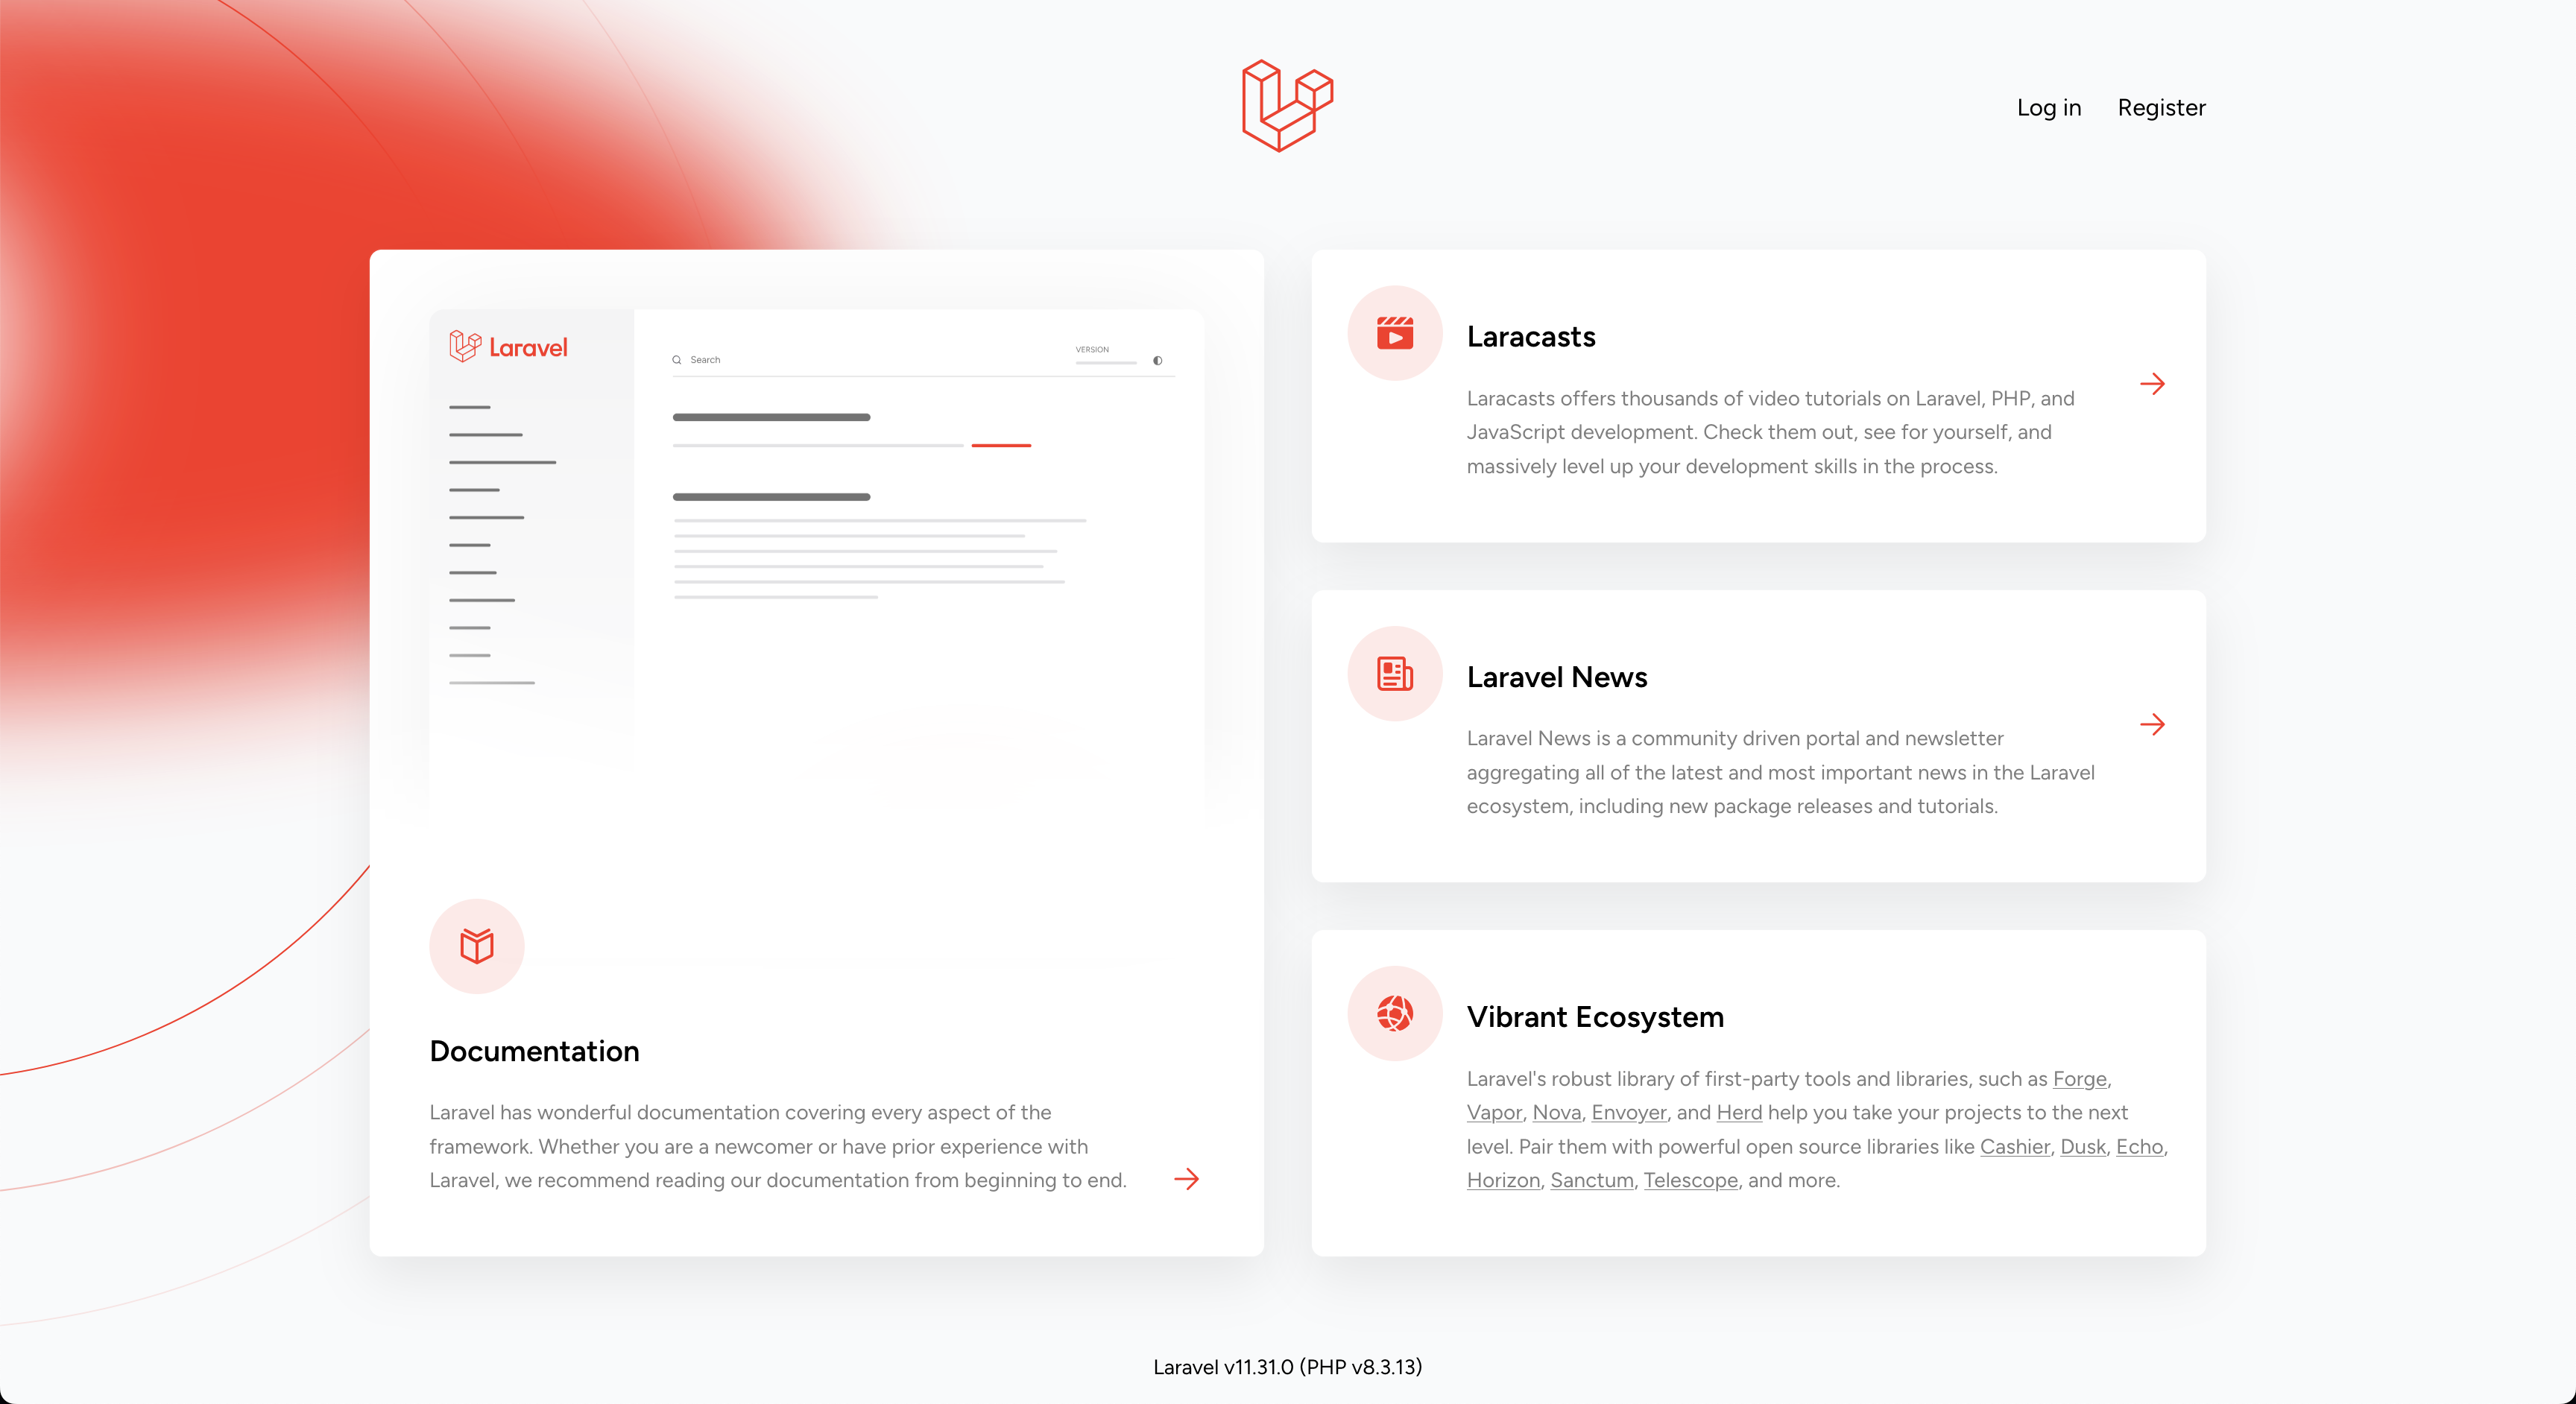
Congrats, you now have a containerized Laravel development environment!
¶TLDR;–What Exactly Do We Need to Do in Laravel?
If you’ve skipped the intro–which is totally fine BTW– welcome to the show!
We’ve covered a lot of information, so let’s take a moment to lean back and assess what’s truly necessary in Laravel based on everything we’ve learned so far.
- Since we’re using the Jetstream starter kit, we’ll need a new layout specifically for pages containing SAP UI Integration Cards. This layout will be useful for building role-specific dashboards.
- Next, we’ll want to set up a route to deliver a
manifest.jsonfile for a simple navigation card. - Finally, we need to create a new page to display our first integration card.
Alright, so let's get started!
Adding a New Layout for Cards
In the context of a Laravel application, a Layout refers to a specialized Component. The main difference is that layouts are generally used to contain all the HTML boilerplate typical of a web page, whereas components are crafted design elements intended for specific sections within a page.
To create a new layout for our pages with SAP UI Integration Cards, we can streamline the process by building on what’s already available. Instead of generating a new component with artisan make:component, we’ll simply copy the existing app.blade.php layout file and customize it to fit our needs.
First, let’s copy app.blade.php directly into the layouts folder as card.blade.php:
$ cp resources/views/layouts/app.blade.php resources/views/layouts/card.blade.php
This gives us a new card.blade.php file that contains all the necessary boilerplate code. We can now adjust it to serve as our specialized layout for pages with SAP UI Integration Cards.
Layouts also need a corresponding component class to handle any specific logic. To set this up, we’ll copy AppLayout.php into a new file called CardLayout.php:
$ cp app/View/Components/AppLayout.php app/View/Components/CardLayout.php
This gives us a starting point in CardLayout.php, where we’ll need to make a quick edit to fully adapt it for our new layout.
Open CardLayout.php and update the following line to reference card instead of app.
// In app/View/Components/CardLayout.php, update the following lines:
-class AppLayout extends Component
+class CardLayout extends Component
{
    public function render()
    {
-     return view('layouts.app');
+     return view('layouts.card');
    }
}
Nice work!
With CardLayout.php updated, let’s keep the momentum going. Next, we’ll edit the card.blade.php file to start shaping our custom layout.
<head>
    <meta charset="utf-8">
    <meta name="viewport" content="width=device-width, initial-scale=1">
    <meta name="csrf-token" content="{{ csrf_token() }}">

    <title>{{ config('app.name', 'Laravel') }}</title>

    <!-- Fonts -->
    <link rel="preconnect" href="https://fonts.bunny.net">
    <link href="https://fonts.bunny.net/css?family=figtree:400,500,600&display=swap" rel="stylesheet" />
+ <script src="https://ui5.sap.com/resources/sap-ui-integration.js"
+         id="sap-ui-bootstrap"
+         data-sap-ui-compatVersion="edge"
+         data-sap-ui-theme="sap_horizon">
+ </script>
    <!-- Scripts -->
    @vite(['resources/css/app.css', 'resources/js/app.js'])

    <!-- Styles -->
    @livewireStyles
</head>
In the head of this template, we’ll add a snippet found in the documentation for SAP UI Integration Cards.
And that’s all there is to it!
Our layout is now ready to incorporate custom HTML tags of type <ui-integration-card … />.
And just like that, our layout is set up to handle custom SAP UI Integration Cards. With just a few straightforward edits, we’ve created a flexible, reusable layout ready to display data-driven components. It’s amazing how quickly we can extend Laravel’s capabilities to integrate seamlessly with SAP UI elements!
Creating a Route for the Internal Data Source
There are two distinct options for including metadata for cards, as described in the documentation. For clarity, we’ll focus on using an external manifest.json file, which acts as a descriptor for SAP UI Integration Cards.
Let’s set up a new route to deliver this file dynamically. Open your routes/web.php file and add a route to serve the manifest. Here’s an example route:
Route::middleware([
    'auth:sanctum',
    config('jetstream.auth_session'),
    'verified',
])->group(function () {
    Route::get('/dashboard', function () {
        return view('dashboard');
    })->name('dashboard');

+ Route::get('/card-manifest', function () {
+     $manifest = json_decode(view('manifest')->render());
+     return response()->json($manifest);
+ });
});
In the resources/views directory, create a new view file called manifest.blade.php.
This file will serve as the template for our JSON data. We’ve taken the navigation list manifest from the Card Explorer:
{
    "_version": "1.15.0",
    "sap.app": {
        "id": "card.explorer.quick.links.list.card",
        "type": "card",
        "title": "Sample of a List with Quick Links",
        "subTitle": "Sample of a List with Quick Links",
        "applicationVersion": {
            "version": "1.0.0"
        },
        "shortTitle": "A short title for this Card",
        "info": "Additional information about this Card",
        "description": "A long description for this Card",
        "tags": {
            "keywords": [
                "List",
                "Link",
                "Card",
                "Sample"
            ]
        }
    },
    "sap.ui": {
        "technology": "UI5",
        "icons": {
            "icon": "sap-icon://list"
        }
    },
    "sap.card": {
        "type": "List",
        "header": {
            "title": "Quick Links",
            "actions": [
                {
                    "type": "Navigation",
                    "parameters": {
                        "url": "/quickLinks"
                    }
                }
            ]
        },
        "content": {
            "data": {
                "json": [
                    {
                        "Name": "Career",
                        "icon": "sap-icon://leads",
                        "url": "/careers"
                    },
                    {
                        "Name": "Company Directory",
                        "icon": "sap-icon://address-book",
                        "url": "/companyDirectory"
                    },
                    {
                        "Name": "Development Plan",
                        "icon": "sap-icon://activity-items",
                        "url": "/developmentPlan"
                    },
                    {
                        "Name": "Business Goals",
                        "icon": "sap-icon://target-group",
                        "url": "/businessGoals"
                    },
                    {
                        "Name": "Travel and Expenses",
                        "icon": "sap-icon://travel-expense",
                        "url": "/travelAndExpenses"
                    },
                    {
                        "Name": "Time off",
                        "icon": "sap-icon://general-leave-request",
                        "url": "/timeOff"
                    }
                ]
            },
            "maxItems": 6,
            "item": {
                "icon": {
                    "src": "{icon}"
                },
                "title": "{Name}",
                "actions": [
                    {
                        "type": "Navigation",
                        "enabled": "{= ${url}}",
                        "parameters": {
                            "url": "{url}"
                        }
                    }
                ]
            }
        }
    }
}
Open your browser and navigate to http://localhost:8000/card-manifest. You should see the JSON output generated by manifest.blade.php with Content-Type: application/json.
With this setup, we’re dynamically serving the manifest.json through a dedicated view, making it easy to manage, update, and customize. This flexibility allows you to adjust card metadata on the fly, integrating seamlessly with your Laravel application.
Creating a Page with a Navigation Card
We’ve prepared our layout, configured our manifest, and now it’s time to bring it all together. The moment has arrived to see our SAP UI Integration Cards in action!
In this final step, we’ll create a page specifically designed to showcase our navigation card and bring dynamic data right into our Laravel application.
Let’s dive into it and watch everything come to life!
First we copy over the dashboard.blade.php to a new view called admin.blade.php.
$ cp resources/views/dashboard.blade.php resources/views/admin.blade.php
Make the following changes to the copied file: update the layout to our newly created <x-card-layout>, set the header to SAP UI Integration Cards Experiment, adjust the styling of the container div that holds our card, and include the custom HTML element with a reference to our own card manifest.
-<x-app-layout>
+<x-card-layout>
    <x-slot:header>
        <h2 class="font-semibold text-xl text-gray-800 dark:text-gray-200 leading-tight">
-            {{ __('Dashboard') }}
+            {{ __('SAP UI Integration Cards Experiment') }}
        </h2>
    </x-slot>

    <div class="py-12">
        <div class="max-w-7xl mx-auto sm:px-6 lg:px-8">
-         <div class="bg-white dark:bg-gray-800 overflow-hidden shadow-xl sm:rounded-lg">
-             <x-welcome />
+         <div class="grid grid-cols-1 gap-4 lg:grid-cols-4">
+             <ui-integration-card manifest="/card-manifest"></ui-integration-card>
            </div>
        </div>
    </div>
-</x-app-layout>
+</x-card-layout>
And as the very last step, we’ll add a route to web.php to display this view.
Route::middleware([
    'auth:sanctum',
    config('jetstream.auth_session'),
    'verified',
])->group(function () {
    Route::get('/dashboard', function () {
        return view('dashboard');
    })->name('dashboard');

    Route::get('/card-manifest', function () {
        $manifest = json_decode(view('manifest')->render());
        return response()->json($manifest);
    });
+ Route::get('/admin', function () {
+     return view('admin');
+ });
});
Before we head over to the browser, we need to rebuild our assets. In the command line run the command:
$ npm run build
And this should be it!
Now head to your browser and go to http://localhost:8000/admin, where you should see the SAP UI Integration Card displayed neatly within our custom layout.
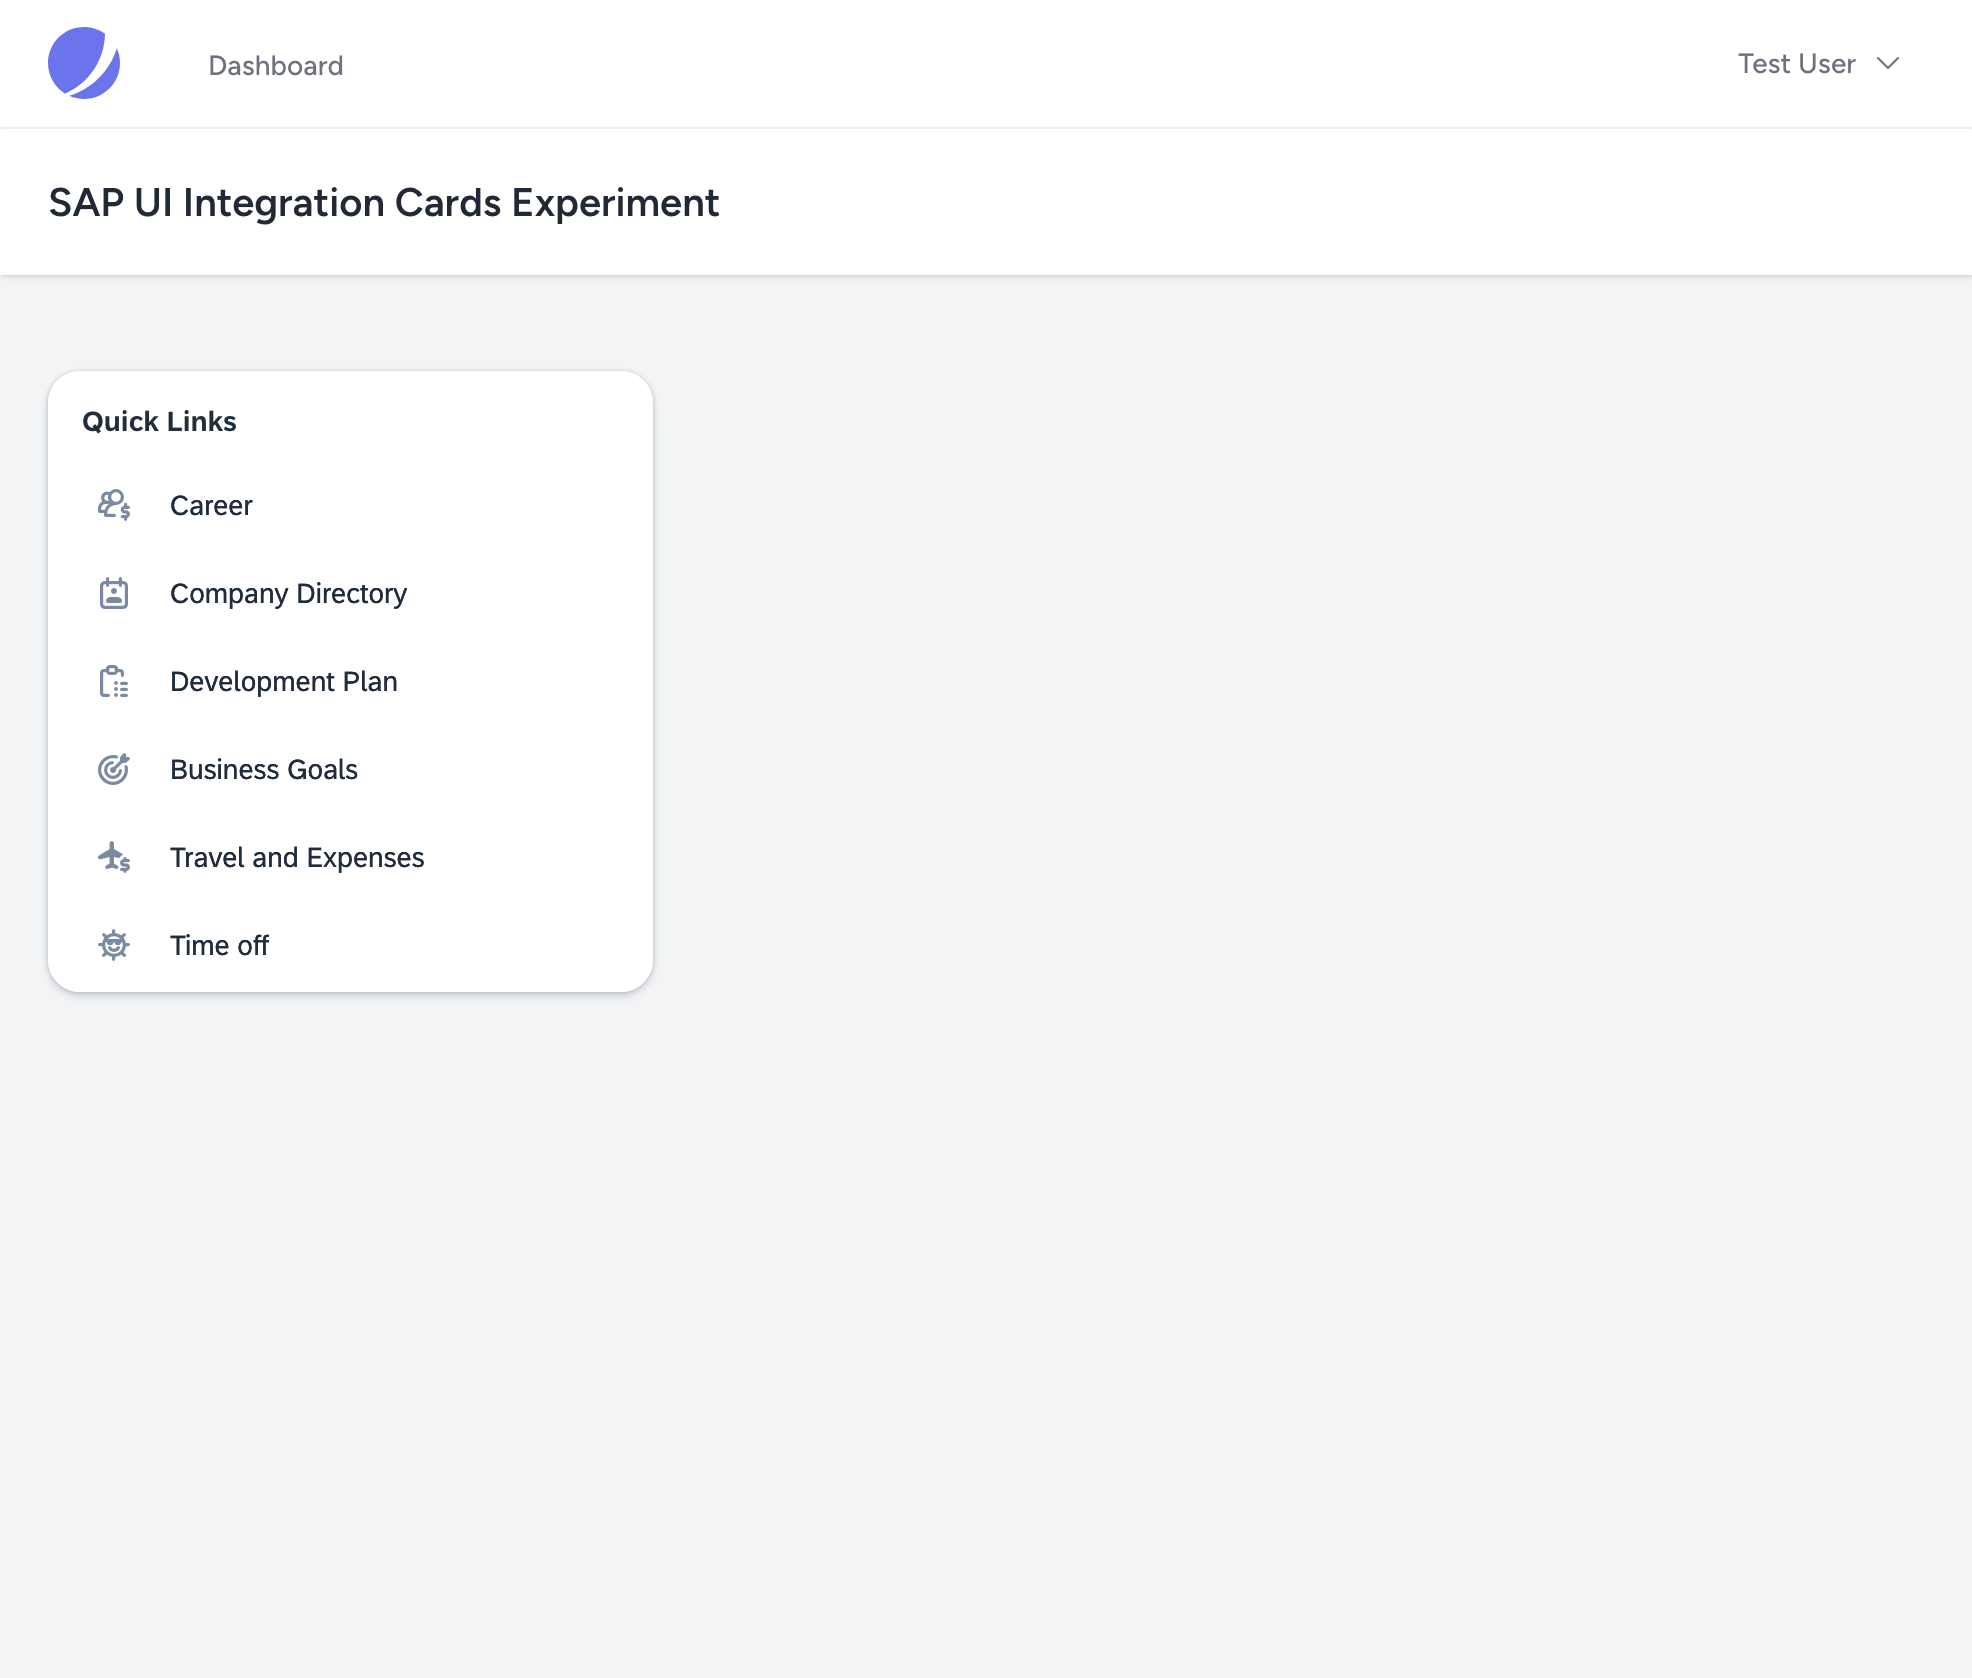
Wow—just look at it! After all the steps, tweaks, and fine-tuning, seeing it live is nothing short of thrilling. It’s that magical moment when all the pieces click together, transforming our hard work into something real and tangible.
The SAP UI Integration Card looks right at home within our custom layout, seamlessly integrated into Laravel. Kudos to you for following through each step and bringing it to life—this is a true accomplishment.5
¶Final words
Isn’t there something incredibly satisfying about this? Do you feel the spark of accomplishment seeing it all come together like this?
As a bit of an IT dinosaur myself, I’ve traveled a long and sometimes painful road creating services for the Internet. Seeing how far we’ve come and watching SAP—a company that took time to gain momentum in the Internet domain—now setting new standards and augmenting the landscape with powerful tools is truly remarkable. The web has entered a new era, and it’s exciting to be part of it.
Thanks for joining us on this journey into the future of web development! If you’re eager for more insights, tips, and tutorials, make sure to subscribe to our newsletter below. Let’s keep building together!
Happy coding!
As stated by SAP on their own website. If you’re interested in their history, those pages will feed your curiosity. ↩
Customers have always been able to view and extend the source code of ABAP programs. However, beyond this access, the source code remained securely contained within the protected environment of the ABAP application server. ↩
If you're working with Visual Studio Code or PhpStorm, you can also start directly from within your IDE. However, for the sake of openness, we’ll use the command line throughout this experiment. ↩
If you want to take a quick peek at the finished application without the hazzle of coding it, head over to our Github repository pragmatiqu/experiments. ↩

About the author
Michael Gerzabek works with engineering teams on system architecture and developer experience in complex SaaS environments.
He writes about the architectural decisions that keep systems understandable long after the first release.